Showing posts with label Family. Show all posts

Friday, January 2, 2015

Crisp Sugar Cookies

Today I'm sharing our family recipe for the most delicious thin and crispy sugar cookies!


Before Christmas, I shared my little Christmas Cookie Baking Vignette that sat on my kitchen counter all through the month of December. It was a sweet reminder of our family tradition of baking our favorite rolled out sugar cookies on the afternoon of Christmas Eve.


I've had requests for the recipe, so here's a little recap of our cookie baking adventure, along with the recipe that I'm happy to share!


We have a Corian kitchen counter and roll the cookie dough directly on the well-floured counter top. Ryan is the dough rolling expect. He has a knack for getting it really thin.  


Ryan uses the tiny cookie cutters around the edges to use up every bit of cookie dough. Engineers always have a plan!


The tiny cookies go on a separate tray so that they bake evenly.


This year, we had a new little cookie helper in the kitchen. Uncle Ryan, Clare thought a little extra rolling was in order!


She also thought the dough was fun to play with ...


and to eat, although we snatched it away from her at the last second!


She finally got the hang of the shakers.


And Clare's cookies were very generously sprinkled!


 Everyone took a turn at cookie decorating, but with a baby on the loose, we didn't take quite as much time as usual for intricate decorating!


Clare got to sample her very first cookie, ever!


And in no time at all, we had a big batch of sugar cookies, all ready for Santa!


This recipe was handled down from my mother-in-law. She got it from a friend many years ago. If you like your sugar cookies thin and crispy, then this recipe is for you!

Crisp Sugar Cookies

4 eggs
2 cups sugar
1 cup Crisco shortening
1/4 teaspoon salt
1 teaspoon baking soda
1 teaspoon cream of tartar
1 teaspoon vanilla
3 cups flour

Mix the eggs, sugar and shortening until blended. Add the vanilla and the dry ingredients. Chill dough overnight. Roll dough thin on a well-floured surface. Cut and bake at 375 degrees for about 6 minutes or until the edges just begin to brown. 

*It helps to return any extra dough to the refrigerator while you are rolling and cutting to keep it well chilled. And we have never tried this recipe using butter as my mother-in-law says the Crisco is what makes the cookies nice and crispy.


 This is a great cookie recipe to have on hand for any occasion through out the year. We made these paw print cookies with blue and white sprinkles to cheer our favorite team on to victory in their bowl game!


And as much as we love these cookies, it's the memories of baking together that we will cherish forever!

Sharing with .....


Wednesday, December 17, 2014

Christmas Cookie Baking Vignette

Today I have the pleasure of doing a guest post for my friend Diane over at An Extraordinary Day!


Diane has been hosting a series on Christmas vignettes and invited me to share a vignette that holds a special memory. So today I'm sharing the little Christmas Cookie Baking Vignette that sits on my kitchen counter. 


It reminds me of one of my very favorite holiday traditions - baking rolled out sugar cookies with my family on the afternoon of Christmas Eve. The cookies are delicious, but it's the love and laughter that makes them extra special. And this year, we have a new little cookie decorator to join in the fun. I can hardly wait for Christmas Eve!


You can check out my guest post over at An Extraordinary Day!


If you haven't already met Diane, I hope you take some time and browse around her beautiful blog. And Diane is not only talented and creative, but one of the sweetest and most encouraging bloggers out there. Her positive energy always makes my day!

Monday, December 8, 2014

Computer viruses stink, but blog breaks are good!

I can't think of a better way to say it, computer viruses stink!
And the people who create them, well they are just mean!

I'm still dealing with the consequences of a malicious virus that
encrypted EVERYTHING on my computer. It's pretty much the worst possible virus and sadly there is no easy fix. I now have my computer back with a new hard drive and my old hard drive has been shipped off to a data recovery center with the hope that my pictures can be restored. Keeping my fingers crossed!

Virus protection will not save you from this virus, so PLEASE be sure that you are backing up your computer regularly. I now have an external drive that is programmed to back up my files every night while I sleep. 

So, I've had an unexpected four week blog break. I used my phone to check in now and then, but that's about it. And guess what, I found it kind of refreshing and liberating to be unplugged. It wasn't life altering or profound, but it just felt good to catch my breath again. I highly recommend stepping away from the computer every now and then. You'll be surprised how good it feels!

So in a nutshell, here's what I've been up to the last few weeks .....

First I took out my frustration by cleaning the house and garage from top to bottom and that felt really good!

We took road trips three out of the last four weekends, cheered for our favorite team and played in the snow!


Sweet Clare celebrated her 1st birthday!


And discovered the joy of cupcakes!


I got my Christmas decorating done in three days flat, a new personal record!


And this past weekend, I celebrated my birthday with my favorite piano man!


It's all about the people who make you smile!

Now I'm actually looking forward to getting back on schedule and seeing what you've been up to lately. Our Be Inspired Link Party will be back first thing tomorrow morning. I hope to see you there!


Sunday, September 28, 2014

Easy Canvas Prints Review & Giveaway

I recently shared our new picture ledges gallery wall.
I just love the way it turned out!
 

This is an easy and economical DIY project that anyone can tackle. And my favorite thing about pictures ledges is how easy it is to update and make changes at any time without nailing additional holes in the wall!


This picture wall is in the upstairs hallway of our vacation home at Penn State and all the photos revolve around our connection here. I still have a long way to go in sorting through our the photos I want to add to the ledges. And new memories are being made here all the time!


This summer Baby Clare made her first trip to Penn State and the Nittany Lion. I love this family photo of Megan, Liam and Clare! So I was thrilled when Easy Canvas Prints asked if I would be interested in reviewing a 16 x 20 canvas print.


Ordering the canvas took just minutes. I simply uploaded my picture and chose my options. Easy Canvas Prints offers a variety of sizes, display and border options, color effects and retouching.


My canvas turned out beautifully! I am so pleased with the look and quality of the finished canvas. The colors are rich and vibrant. What a great addition to our growing gallery of photos!

 
And Easy Canvas Prints was nice enough to offer a free 16 x 20 canvas to one of you too!
 
Thanks so much Easy Canvas Prints!
 
Just leave a comment below telling me what photo you would choose!
I'll announce a winner on Monday, October 6th!
 
(Please be sure to have an email address associated with your profile. If you leave a no-reply comment, I won't be able to contact you if you are the winner and that would just be sad!)
 

Thursday, September 18, 2014

Picture Ledges Gallery Wall

I've wanted to do a gallery wall of family photos for the longest time. I have a whole Pinterest board filled with inspiration, but the idea of committing to a design and nailing all those holes in the wall made me cringe. I knew I wanted the flexibility to change things up, so picture ledges were the perfect solution!
 
 
The upstairs hallway at our townhouse is long and wide, the perfect spot for a gallery wall.
 

Kevin got a jump start by marking off the studs along the wall.


We were making two ledges and I wanted them as long as possible. We purchased two 1 x 4's, two 1 x 3's and two 1 x 2's and we were careful to pick the straightest boards possible. They were all ten feet long, the longest boards we could find at Lowes. I gave all the boards a light sanding before we began putting them together.


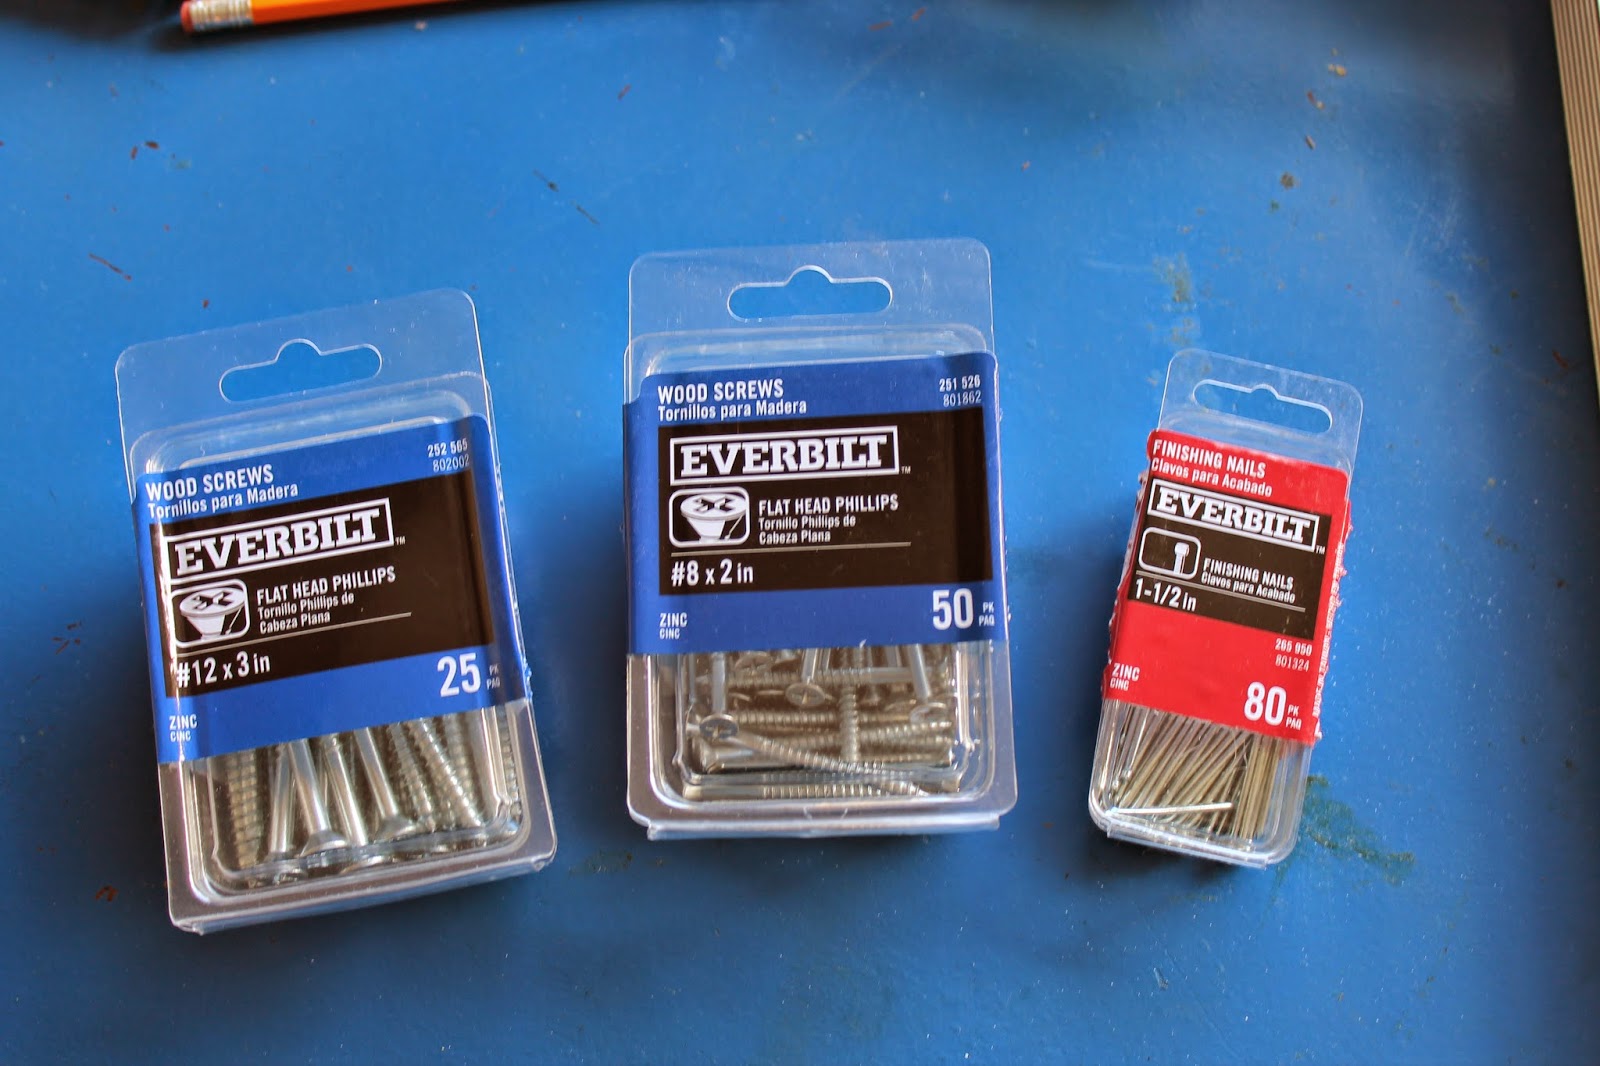
We also purchased two packs of wood screws and a pack of finishing nails.


The construction of the ledges was pretty simple.
 
 
We attached the back boards (1 x 4's) with a bead of wood glue and the 2 inch screws every 10 inches.
 
 
The front boards (1 x 2's) were attached with a bead of glue and the finishing nails every 6 inches. We tapped the nails in and filled the holes with putty before painting for a nice finished look.


I primed, then painted the ledges with two coats of Sherwin Williams Pure White, the same color as all the trim in the house.
 

*I've seen plans for photo ledges using 1 x 4's for both the back board and the bottom board. At one point, that's exactly what we had in our cart at Lowes. But the longer I stood there and thought about it, that just seemed too big. I wanted to be able to layer the frames, but not have the ledges stick out from the wall any more than necessary. I think this size works really well. I am so glad we went with the 1 x 3's for the bottom board.
 

I purchased some really inexpensive frames from Michaels. To start out I'm using all black frames with off-white mats for a uniform look. I may mix in other frames later, but this was a good starting point.
 
 
 I cut out some craft paper in the sizes of the frames to get an idea on the spacing for the ledges.


We decided the lower ledge would be 32 inches from the floor and the higher ledge would be 57 inches from the floor.
 
 
The ledges were then screwed into the studs (through the back boards, every 16 inches) using the 3 inch screws. We did not recess the screws as they will be covered by photos, but I did dab a bit of white paint on each screw head. I couldn't wait to prop up some frames. Even with a wall of sunflowers, I was totally thrilled with the results!
 
 
This gallery wall has a very specific theme. Our townhouse is in our college town - a place very near and dear to our hearts. Kevin and I met at Penn State in the fall of our senior year, 37 years ago. We fell in love with each other and this place all at the same time. We've been coming back ever since and both of our children are now Penn State grads too. This summer, the weekend that we build these picture ledges, Baby Clare made her first trip to Penn State.
 

Maybe one day she'll be a Nittany Lion too!


I've barely made a dent in sorting through 37 years of photos.
This will definitely be a work in progress. And that's why the picture ledges are so perfect!


There have been tailgates and whiteouts, bowl trips and graduations, cheers and tears, love and laughter shared with family and friends!


These family photos tell a very special part of our life story!